Emergency Water Sources

In a wilderness emergency, especially one in which you suspect that you may not be rescued within 72 hours, potable water can be critical to your survival. This is because by that point – perhaps even sooner depending upon certain factors like the weather, your level of physical exertion, and medical condition – your bodily functions begin to become impeded and your mental status impaired. So, while you may have the necessary equipment to filter and purify water, you have to first find it.
Can you?
Just in case you are uncertain, let me share with you a few ideas and tips to consider.
Where to Look
Here are a few suggestions on finding sources of water:
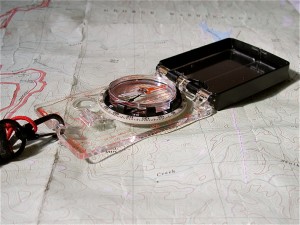
- Keep in mind the basic truism that water doesn’t flow uphill or run along the top of ridgelines, so you’ll have much better luck looking in low spots, like valleys and drainages. There, not only will you have better luck finding water that has pooled, but you may stumble across a small flowing stream (and following it downstream may even lead you to a junction with another). One clue that there is possibly water in such low areas is vegetation that is greener and more dense. In any event, this is one of those circumstances when having a map – and knowing how to read it – can come in handy.

- Though it may appear contradictory to what I have just written in my last paragraph, I frequently find that in the Appalachians (the region of the country with which I am most familiar) small springs appear just below ridge crests, out of which water can flow quite abundantly, especially in the Spring and early Summer. As a general rule, this water is potable – However, definitely keep in mind that it may not likely be if it has been contaminated by, for example, an abandoned mine nearby (something that is very common in Pennsylvania) in which case telltale signs will be water that is colored and has an odor (which no amount of filtering and purifying can make potable).
- Consider letting the local fauna be your guide. After all, they need water just as much as you do so they already know where to go. So look for and follow the game trails of our four-legged friends. You can also watch for our feathered-friends, as they will often visit a water source in the morning and in the evening. Generally, it is supposed that birds heading to a water source tend to fly in a fast, straight line, while they leave it in a more rambling way. In my mind, though, there is the risk of blindly going off-trail and becoming lost (or even more so), or getting hurt as you bushwhack … thereby making an already bad situation worse.
- During the Winter season, you can always melt snow and ice to drink. If you have the means to make a fire, this makes the process easier. Or, if you can put it in some type of container and keep it under your clothes until it melts, that’s another option, albeit a slower (and chillier) one. Either way, you should avoid the temptation of popping snow or ice directly into your mouth as you can risk quickly cooling your core body temperature, thus becoming hypothermic.
Solar Still
 I know that solar stills are often touted on survival television shows and in books as primary sources of water, but I don’t believe them to be the best initial choice. To make one, you typically need to dig a hole that is roughly 3’ x 3’ x 3’.
Have you ever dug such a hole?!
To me, at least, it isn’t easy – it’s sweaty, frustrating work that often requires digging up roots and around rocks, usually with a knife or some other improvised shovel. Plus, it uses up much needed energy that is probably better spent on your other survival priorities. Besides, solar stills don’t yield that much water.
I see them as a “last resort” instead.
My Preferred Methods
Here are some options to consider that can provide you at least some water with a reasonably low degree of effort and risk:
First, you can collect dew in the early morning by tying a bandana or some other cloth to your leg, then walk through high grass — or even wipe dew off from the inside of your tent or your emergency shelter (depending on the material that you used) that has formed due to your breath and sweat — then periodically wring out the water into a container, or simply suck on the cloth.
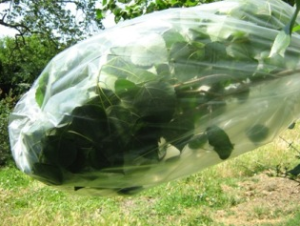
 Second, a transpiration bag can be a terrific option, but I rarely have seen it demonstrated on television or mentioned in books. Take a garbage bag or some other large piece of plastic, and tie it around the end of a leafy branch (wrapping as many leaves as possible – and making sure that it isn’t a poisonous tree or bush). Over the course of several hours, water will condense out from the leaves and drip to the bottom of the bag. Technically, the water is potable, but from my experience, you’ll want to at least filter it. Depending on a few factors, like the type of tree or bush, the temperature, and the amount of direct sunlight, you can retrieve a sizeable amount of water over the course of a few days.
Conclusion
Regardless of which method you think better, let me leave you with two final considerations.
First, remember that water that is safe to drink typically best requires a two step process: filtration (whether through a cloth, pump, or some other improvised means) AND purification (either through chemical, radiation, or heat). Of course, there are exceptions to this rule, but why unnecessarily risk making an already bad situation worse with, let’s say, diarrhea.
Second, like any other survival skill, reading about it and then actually performing it in an actual emergency, under physical and mental stress, are two entirely different things. So I encourage you to at least practice and experiment before you need too.

